First thing I did was to go to The Graphic's Fairy and select my graphic, Link.
You see the image behind the box. After printing out the image (I printed it on a full sheet label) I cut around the image. This step is not necessary as you may want to print an image and just trim it down to fit your box.
I had cut the box down using a box cutter - not an X-acto knife, the paper the boxes are made from is very stiff and after drawing a line around your cut area, very carefully cut off the portion you do not want. If your blade is sharp it will not be necessary to do anything to the edge but if the edge looks a little ragged, use a little sand paper to clean the edges. Again, the cutting of part of the box not necessary, but is easy to do. I used the part I cut off to sample my paint. My image was lovely with muted colors so I chose moss colored chalk paint, then after drying went over with a silver color.
Painted the top and the bottom and put them in my oven "paint booth." I turn the oven on to the "warm" temp, then turn it off and leave the oven light on - amazing how much heat builds up with just a light bulb. Don't worry paper will not ignite until 450° and the heat from the light bulb while effective, will not harm your project.
Once dry, I went over the edge only of the top with some green paint, back into my paint booth to dry and then I added some Cricut images and letters that I had cut out with my machine. If you don't have a machine you could use stickers. You always have the option to just hand paint at anytime.
After the stickers applied, go over the top and sides with the chalk paint, back to the paint booth (oven) and when dry take a straight pin and gently lift a corner of the sticker and pull them all of and voila you have the design you desired.
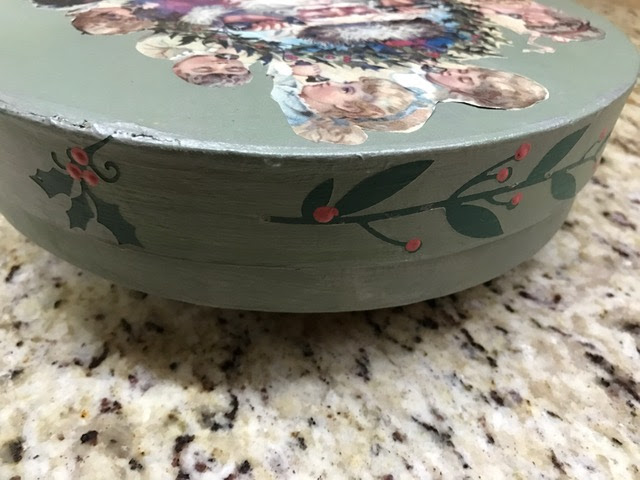
 I simply dipped the end of a paint brush to make the red berries - just make sure you dip the end each time so that the berries will be uniform in size. If you try and get more than one berry out of a dip, each time the image gets smaller.
 Beautiful image and the silver second coat was worth the effort - a little shimmer but not shiny.
I used some green sizzle to line the box and give a cushion for the little gifts to nestle in and not move around.
Some fun Christmas candy, a $1,000,000 candy bar, some gold President Kennedy .50¢ pieces, candy cane with Skittles, a Pocket Posh Christmas puzzle book - these fun books are from the UK and they make a zillion different ones and are good for kids and adults alike. I will had a few more things I am sure - like some $2 bills, maybe a little iTunes card - point is there is room for some more in this little "stocking box."
This is a fun and easy project and you don't have to do the extras as you could simply go to The Graphic's Fairy and pick a graphic and adhere to your painted box. The stickers make for an easy way to add some more charm to your box but you could do the same thing by painting yourself or not. Just be sure not matter what you choose to do to end with the Mod Podge (or other product) because it is important to seal your image and paint.
Resource
Graphics, The Graphic's Fairy
Cricuit Cartridge used, Joy's of the Season
Silver overcoat, Folk Art, 662E, Sterling Silver, craft stores
Dark green, Americana, Deep Teal, craft stores
Chalk paint, first coat of paint, Waverley, Moss, craft stores
Berries, Americana, Santa Red with a little white mixed in, Craft stores.
Paper Mache boxes, craft and hobby stores
Pocket Posh, Christmas puzzle book, Link
Full sheet labels, Link
Thank you for stopping by.


