EASY SPRING BOUQUET
The St. Pat's decorations are down and put away until next year and holy moley Easter will be here soon (Sunday, April 5th) so I am busy decorating and crafting for Easter. I envisioned a spring bouquet on my entry table so I got busy and made one and thought I would share my process as it is the same for any arrangement.
 The first step (after thinking about your design, in my case I wanted an airy arrangement with spring flowers, greenery and curly willow) is to gather your supplies - greenery, flowers, curly willow, florist foam, glue, GOOD needle nose pliers, some raffia and if needed some rocks or glass beads if you need to weigh down your arrangement for stability.
Cut the greenery and flowers off of the stems using the needle nose pliers - sometimes the wires are so thick I have to have my hubby cut them for me.
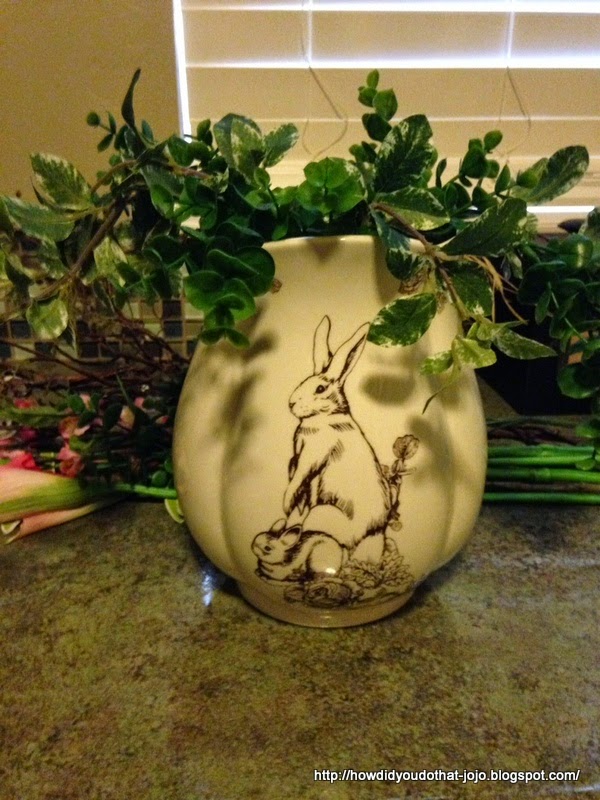
I just happened to have this bunny cookie jar from a long time ago trip to HomeGoods so I took off the lid and then glued several blocks of florist foam to the inside. Then I started with the bottom greenery - just have to push it into the florist foam. Remember all these artificial flowers and greenery have wire in them so bend them and arrange until you are happy with the way they look.
I chose pink Calla Lilies as my focus flower - cut the first flower to the height that looks in scale for the container and then work from that height.
Added the additional four Calla lilies (remember to use an odd number as in nature).
You just keep building on your original flowers - I added some tulips, cherry blossoms, apple blossoms and curly willow as well as the greenery at the bottom - lastly added a little raffia bow for some additional texture and natural color. All of these stems, including the curly willow, came from the craft store.
I fully realize that not everyone will have the just right container or want to spend money on one - I made this container from an empty paper coffee can, a printed sheet of a pattern I found online (it is actually a sample of a finish for a table), printed it out on an 81/2 x 11 full sheet label, trimmed it - it did not go all the way around the can so I used the part I cut off the top to finish off the back, tied on a little raffia and added a couple of sprigs of greenery.
This is the can that I used and what the print out looked like - you could use wrapping paper, scrapbooking paper, whatever you like. I found it easier to print out on a label as I then avoided having to glue onto the can.
If you make your own container like this you will need to Glue in the first block of florist foam and then pour in the rocks/glass beads for stability and then add the additional foam. The florist foam shown here and the glass beads are from the $ store.
I purchased all of my flowers and greenery at Hobby Lobby and made sure I bought them when they were 50% off. The $ store does carry a lot of artificial flowers and Walmart's have a floral section.
The first step (after thinking about your design, in my case I wanted an airy arrangement with spring flowers, greenery and curly willow) is to gather your supplies - greenery, flowers, curly willow, florist foam, glue, GOOD needle nose pliers, some raffia and if needed some rocks or glass beads if you need to weigh down your arrangement for stability.
Cut the greenery and flowers off of the stems using the needle nose pliers - sometimes the wires are so thick I have to have my hubby cut them for me.
I just happened to have this bunny cookie jar from a long time ago trip to HomeGoods so I took off the lid and then glued several blocks of florist foam to the inside. Then I started with the bottom greenery - just have to push it into the florist foam. Remember all these artificial flowers and greenery have wire in them so bend them and arrange until you are happy with the way they look.
I chose pink Calla Lilies as my focus flower - cut the first flower to the height that looks in scale for the container and then work from that height.
Added the additional four Calla lilies (remember to use an odd number as in nature).
You just keep building on your original flowers - I added some tulips, cherry blossoms, apple blossoms and curly willow as well as the greenery at the bottom - lastly added a little raffia bow for some additional texture and natural color. All of these stems, including the curly willow, came from the craft store.
I fully realize that not everyone will have the just right container or want to spend money on one - I made this container from an empty paper coffee can, a printed sheet of a pattern I found online (it is actually a sample of a finish for a table), printed it out on an 81/2 x 11 full sheet label, trimmed it - it did not go all the way around the can so I used the part I cut off the top to finish off the back, tied on a little raffia and added a couple of sprigs of greenery.
This is the can that I used and what the print out looked like - you could use wrapping paper, scrapbooking paper, whatever you like. I found it easier to print out on a label as I then avoided having to glue onto the can.
If you make your own container like this you will need to Glue in the first block of florist foam and then pour in the rocks/glass beads for stability and then add the additional foam. The florist foam shown here and the glass beads are from the $ store.
I purchased all of my flowers and greenery at Hobby Lobby and made sure I bought them when they were 50% off. The $ store does carry a lot of artificial flowers and Walmart's have a floral section.
Resource
Bunny Cookie Jar, HomeGoods
Florist rocks, IKEA
Florist foam and glass beads, Dollar Tree
Artificial flowers, greenery and curly willow, Hobby Lobby
Thank you for stopping by.


MAY YOUR EASTER BE A VERY, VERY, HAPPY ONE!!!!!!!!!!!!!!!
ReplyDeleteAnd the same to you dear Anonymous! Thank you for stopping by.
ReplyDeleteBeautiful!
ReplyDeleteThank you so much Kim. I am just finishing what I hope will be the last little piece of this years Easter display on my entry table. With Easter being so early this year it has sort of sneaked up on me and I am trying to get everything finished. Thank you so much for your lovely comment and for stopping by.j.
ReplyDelete