Thursday, March 31, 2016

BOTANICAL PRINTS MADE EASY

I love botanical prints.  One of the great things about them is that they are so versatile - the go with any decorating theme. Depending on the framing or the subject matter you can make them look Asian (use Asian botanicals, red or black lacquered frames) country, traditional, etc. You can send the files to an outside printer and have them put on different types of paper, made large, etc. I chose to print them on good quality matte photo paper and frame them in simple frames with no matte - just the glass backed with glass. There are many outside places that will print for  you for example Staples will allow you to submit your PDF files from their website or take them to the store on a USB flash drive.  The cost of an 11 x 17 print on cardstock paper in color is $2.38 per copy and if you want to print on cardstock in black and white it will be .42¢ per copy. Staples is just one of many vendors who will do this for you. Or - you can do them yourself as I did but unless you have a special printer the largest size you will be able to create will be 8 1/2 x 11.
The first thing to do is to find your prints and this is actually quite easy.  The Graphic's Fairy has a good selection but the best place is the Peter H. Raven Library of the Missouri Botanical Gardens.  I entered the site through Curbly but I will put a direct link to the library in the resource section.  If you just Google "Free Botanical Prints" you will find lots of sources and also see a book called Instant Wall Art. The book is reasonable but I loved looking at the different prints and I chose prints that had meaning to me - orange, lemon, English walnut and pine.  I did not chose them because of color but because of what they have meant to me in my life. I started by printing out my first print on this Kodak Matte paper - I always keep it around because I love the way the color comes out - amazing.  You could also print these out on linen or canvas paper. Another and more varied source for art that is in the public domain is a site called Vintage Printable.  This site has lots of images that are legal for you to use.  Remember to make sure that any image that  you use is not copyrighted.
I set my printer on the matte paper setting and best print and was amazed at the quality of the printing.  It looks so much better in person.


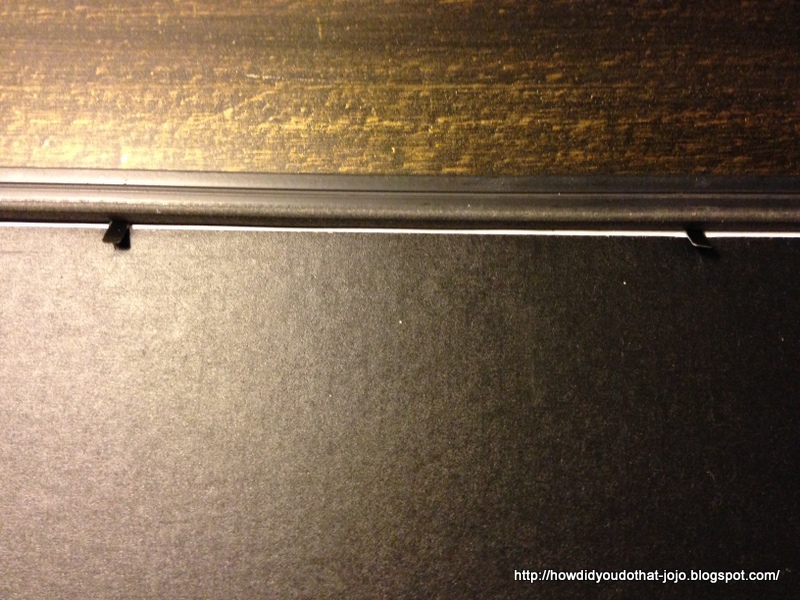
I bought simple frames and removed the backs and the points that hold the back in with needle nose pliers (see the first photo) then used glazing points to keep the glass in the frame. These frames are around $10 and when I bought mine they were on sale half-off.
After printing  the botanicals I set them on the floor and set one on the top of the frame to see if I liked the look before going forward.
Before framing the edge needs to be removed.  No matter how you set the printer to print to the edges you will always have some part of an unprinted edge.  Either carefully cut the edge with scissors our preferably use a cutter like this to trim the edge.  The cutters are inexpensive and perfect for a job like this.
The best way to finish off the prints is to have another piece of glass cut and place the print in place and glue the back piece of glass.  If you do not want to do this than you could use a clear adhesive dot - this is just one brand they are readily available at any craft store or you can make your own using Aleene's Tack-It over and over glue.
 
This is the wall where the botanical prints are to be placed.
Left side....
Right side....
Finished - well maybe.  The angle of the photo is a little deceiving as the prints look more in scale than the photo shows.  I have decided to live with them for awhile and I may decide to send some files to Staples and frame larger prints or maybe will just leave them as is....time will tell. I also need to decide if I want to go to the expense of non-glare glass as this area of my house gets lots of sunlight. As I say, time will tell.

This is an easy and inexpensive way to bring some nature into your home.  Simple frames, fussy frames, matted, not matted, prints that fill the frame, your call, your house. These also make a great gift.

Resource

Graphic's Fairy, Botanicals,  http://thegraphicsfairy.com
/?s=botanicals
Peter H. Raven Library,http://www.botanicus.org/item/31753002839139
Vintage Printable, http://vintageprintable.com/
Paper cutter, http://amzn.to/1MCcs4
Zots, http://amzn.to/1MCcARn 
Glazing points, http://amzn.to/1UtzywN 
Kodak Matte Photo Paper,  http://amzn.to/1M1g6oo
Canvas paper for inkjet printers, http://amzn.to/1q3W2Z1
Aleene's Tack-It over and over glue, http://amzn.to/232KIKj
Frames, Hobby Lobby

Thank you for stopping by.


Tuesday, March 29, 2016

TASTY TUESDAY POACHED PEARS

Sometimes the simplest things are just the best and I think that poaching fruit is so simple and just so darned good.  By taking out a lot of the sugar calories (the added sugar) you still end up with a really good way to end the meal.  I grew up eating lots of fruit and lots of dried fruit so fruit for dessert is something we really enjoy.  All you need is poaching liquid and to that liquid you will need to add whatever combination of spices and herbs you like, sugar and water.  That's it.

The classic way to poach fruit is to use wine, that's how you get those beautiful pears that look like red candy.  I chose to start with some Constant Comment tea....
Before pouring in the hot water I added one half of a vanilla bean, some whole cloves and some wide orange rind slices. Use whatever combination sounds good to you.
The last liquid I added was a 12 ounce bottle of hard pear cider, you could use apple juice, wine, etc. whatever sounds good to you. Finally, I added 1/2 cup of the Truvia(it has 75% fewer calories than regular brown sugar) brown sugar blend and stirred it to mix everything.
Hubby loves pears (me too) and I like to use them for poaching because all you  have to do is to peel them and they are ready to go.  Chose pears that are ripe but still firm.  I chose red pears.
Once my tea had steeped I mixed all the liquid and spices together, placed in a pot and then took some parchment paper, folded it in half and cut out a steam circle and then cut around so that it fit in the pot.  I needed more liquid so I removed the parchment, added some water and put the parchment back on and poached the pears for 30 minutes.  They were perfect and my kitchen smelled so good.
When the pears were done I removed them to a plate and then using a slotted spoon removed the orange, vanilla bean and the cloves, turned up the heat and reduced the liquid and it will become very syrup like.  Turn off the heat and let it cool.
I placed the pears in a footed glass and just before serving, spooned some of the poaching syrup over the fruit. As I mentioned earlier, this is so simple but oh so good and I do not feel it needs any further embellishment but you could add some whipped cream or a little vanilla Greek yogurt.  I like it just the way it is and Hubby does too.

Thank you for stopping by.


Thursday, March 24, 2016

EASTER IN THE ENTRY!

When I first saw this vintage advertising sign I just loved it but was not sure where I would use so I did not order - but then Antique Farmhouse offered it again and I succumbed and ordered! The sign is metal, good on both sides, is 19 1/2 x 9 1/2 and is a replica of a horticultural collection from the 1800's. It does not come with the stand, you can either affix the sign permanently to a wall, fence, etc. or just sit it down as it will stand alone at an angle (it has a bracket on the back with holes drilled for hanging). I made a little drawing and hubby put together a stand for me.
Here is the stand before being painted - Hubby is holding the sign into position.  I wanted the sign to have some height and this seemed to be a good solution.  It does not have to be permanent as only two screws affix the hand to the stand and are easily removed. I do not give instructions to the more complicated projects but if you are interested in how I made the stand just go to the "Contact Me" section on the right of the blog and send me an email and I will be happy to send you the complete instructions.
My goal was to make the entry look like a spring garden and I needed a wreath for the mirror. After looking at plain woodsy looking wreaths at my local Tai Pan Trading store I found what I liked but did not like the price tag.  My solution was what I call the "five minute wreath."  What you see in the picture are all the supplies you need (I did also add a bit of greenery but will tell you about that later).  I purchased a wisteria garland (five feet), you know those long pieces of greenery, I had some cherry blossom faux flowers in my stash so pulled a few of them out along with a pipe cleaner that I cut in half.
Simply draw the garland into the desired circle size and then using the pipe cleaner tie it together in two places.  I prefer pipe cleaners to wire as they are much easier on  your hands - I used the green so that it would not be seen. I next added the cherry blossoms and then after I placed the wreath on the mirror added a little greenery to the more sparse area - this would not be necessary if you were adding a bow but I wanted this to look woodsy, more natural - no bow.
Ta da....the woodsy cherry blossom wreath. This is the part where I added a little more greenery in the sparse area.  Please note that I did not use any glue, etc. and therefore it will be very easy to take apart and use the greenery for other things.  If I wanted to keep this as a permanent wreath or use it outside I would use glue to affix all the cherry blossoms and other greenery to the wreath.
The "picket fence" in the "garden" is just two lengths (they fit together) of fencing from the Dollar Tree store - no need to affix it to anything it is simply sitting on the table. Of course I had to add bunnies.
Some more bunnies and some speckled, natural looking eggs, some greenery on the sign and some flowers added to the fence.......
Even though the font on the stand is a little different I think it looks great. We used some reclaimed Idaho barn wood that Hubby put through his planer and out came this beautiful wood with tiny worm holes, etc.  I almost hated to paint over the wood.
A little Happy Easter garden complete with bunnies, eggs, greenery, flowers and a sign directing you into the garden.

Resources

W.W. Rawson Sign, Antique Farmhouse, click on the link, in the box on the right side of the blog - Antique Farmhouse.
Vintage Market & Design, http://www.vintagemarketanddesign.com/products/garden-supply-shop-sign 
Fencing, Dollar Tree
Metal stand, Antique Farmhouse
Twin Bunnies, Antique Farmhouse
Garden Bunny, HomeGoods
Speckled eggs, Tai Pan Trading
Greenery, Tai Pan Trading
Lavender wreath on stand, HomeGoods

Thank you for stopping by. 

Tuesday, March 22, 2016

TASTY TUESDAY CHICKEN CORDON BLEU CASSEROLE

I love Chicken Cordon Bleu with it's crunchy outer layer then the chicken, ham and soft, dripping Gruyere center, so I thought I would try and get the same flavors with a lot less fat. I made the dish into a casserole with six servings and paired it with some stir fried asparagus and onions, cooked carrots and a side salad.  Great dinner with the only starch item being the little bit of panko on the top of the casserole, 3-5 servings of veggies (depending on what you put into your salad) and a nice serving of protein.

Reminder the "Tasty Tuesday" items are recipes that we love that are either newly created and are healthy and contain ingredients easy to find and are easy to fix or old favorites recreated to take out as much sugar, fat and calories as is possible and still be tasty.
Easy to find ingredients...those showing plus a pound of baked chicken breasts (or poached).
I usually shred chicken with my hand mixer but my oldest son said he uses the paddle in his stand mixer (thank you R&L) and it works beautifully and easier.
Using Pam or other spray, coat the bottom of  your casserole dish (I used a 9x13 casserole dish), spread the shredded chicken on the bottom and then ham (I used Trader Joe's uncured ham slices)...
Slices of reduced calorie Swiss cheese....
Gravy on top....
Finally into the oven with the seasoned Panko on top...
Out of the oven with the crispy Panko topping.....
Served with carrots, asparagus and onions stir fried in a little EVOO and a side salad (not shown).  Healthy and delicious dinner.

Preheat oven to 350°

Ingredients

1 pound baked/poached chicken breast, shredded
6 slices reduced calorie Swiss cheese
9 slices of low fat, thin sliced ham

Sauce

You can either make a white sauce using skim milk and add some Dijon mustard, salt, pepper (use light butter to make the roux) paprika and pepper.

I made my sauce using a jar of Heinz chicken  gravy.  I keep this item around in both chicken and beef because it is very low in calorie and fat and is handy to use as a base for sauces.  To the jar I added 1T brandy (could substitute apple juice) 1 heaping T of Dijon mustard (Edmond Fallot is my favorite and I used the one with marjoram) 1/4 tsp dried tarragon, salt, pepper and a tablespoon of sour cream.  Mix this all together and be sure and taste. When heated, set aside.

Topping

1 1/2 cups of panko bread crumbs
1/4 cup light butter
1 1/2t garlic powder
2tsp chopped fresh parsley 
1/4 tsp black pepper

Mix together all ingredients and set aside.

Directions 

Spray a 9x13 casserole dish with Pam or other spray and then add the shredded chicken breast, the ham and then the Swiss cheese, pour the gravy over the meat and top with the bread crumbs and spray with the non-stick spray.

Bake uncovered for approximately 25-35 minutes until the topping is nice and brown.

Makes six servings, each less than 300 calories.

Thank you for stopping by.


Friday, March 18, 2016

TWINKIE PEEP RACE CAR CAKE FOR ALZHEIMER'S IDAHO

If you follow this blog you will know that I make the dessert for the Alzheimer's Idaho (local grassroots organization) support group for it's monthly dinner.  The hostess is well known by family and friends as a real Twinkie lover so I thought an Easter themed cake with Peeps race car (Twinkie cars) drivers might make her happy!

I usually purchase an angel food cake but to have enough room for the "cars" on the top of the cake I needed a larger cake than I could find to purchase.  This could not be easier - cake mix and water......I chose the confetti cake because I thought it went well with the theme.
Making the cake was actually big fun - mix + water and turn on the mixer and whip away.
I just followed the directions on the box as to oven temp and time to bake and then as per instructions set the cake on it's side to cool before removing from the pan. See the little confetti's aren't they cute?
I am going to put a filling into the cake so I cut off the top about 2" down.
Next cut a little tunnel about 1" wide and scoop out the cake (I saved the cake and made Hubby a little trifle for dessert tonight).
The frosting is a stable whipped cream frosting and I took enough to fill the tunnel (just eyeballed the amount) and added some red food coloring to make it pink so it looked pretty when cut.
Frosted the cake....
Sprinkled the top with pastel colored confetti sprinkles.....
Using some of the frosting "glued" the mini cookies on the front and back for my "tires" made a cut in the Twinkie and set in (with a little frosting) the Peep "driver" and added his yogurt covered pretzel "steering wheel."
Added four more drivers.....
Ready for delivery with some vanilla ice cream.  I hope these wonderful women enjoy Jerri's Twinkie Easter cake!

Stable Whipped Cream Frosting

Ingredients

8 oz reduced fat cream cheese, room temp
2 cups whipping cream
1/2 to 2/4 cup sugar, depending on desired sweetness
1 tsp vanilla*
1/2 tsp almond extract*

Using the whisk attachment of your stand mixer whip the cream cheese until it is nice and fluffy, add in the sugar and your desired extracts and whip to fully incorporate and then add in the 2 cups of whipping cream and beat until nice stiff  peaks form.  For this particular cake take out enough frosting for the filling and color as desired, put the top back on the cake and then using the remaining frosting, frost the cake.

*I used 1/2 tsp vanilla and 1 tsp Fiori Di Sicilia (beautiful citrusy flavor), you could use what extracts appeal to you.

Resource

Fiori Di Sicilia, http://amzn.to/1RqcEPX

Thank you for stopping by.