I have worked many times with paper mâché boxes and have done blog posts using this product. This is the first time I have attempted to cut the boxes down. I wanted to trim the box down so I could use the little boxes - just draw a line around the box and cut (carefully) with a box cutter - not an X-acto knife - the boxes are very sturdy. I confess that my sweet hubby cut mine for me. Once you make the cut just sand the rough edges and voila you have a small box filled with little ones. You can use the piece that was cut off to test your finish if you like.
Boxes cut down, ready to decorate. So of course I mosey over to The Graphic's Fairy to find the perfect vintage images for my boxes. I printed them out on full sheet labels - if you don't have you can print them out on plain paper but you will have to then glue them to the boxes.
After printing out your images place them on the box to make sure that the scale is correct. You may just leave them as they are but I decided to cut around the images.
I wanted to do some polka dots (love them) you need to decide the size you want. I find the best way to do these is with the end of a paint brush - the size I wanted was the "first dip" so each time I placed a dot I went back to the paint and dipped again - you have to do this to get a consistent size because if you try and use the same "dip" again, each time the dot becomes smaller.
Because your product is paper, it needs to be sealed. I chose to use Annie Sloan's decoupage but you may use Mod Podge or whatever product you like. You can also make your own with white glue and water. Not only does this finish give a semi-gloss look to the product but it acts like a glue and your image will stay put.
When doing painting projects like this one I use my oven a lot. Just turn on the oven light (no oven temp please) and it becomes a nice drying booth - amazing how warm the small space becomes with just the heat from your oven light.
The little boxes were painted, cut images applied and dots applied to the top of the kids box and the top of the bottle carrier.
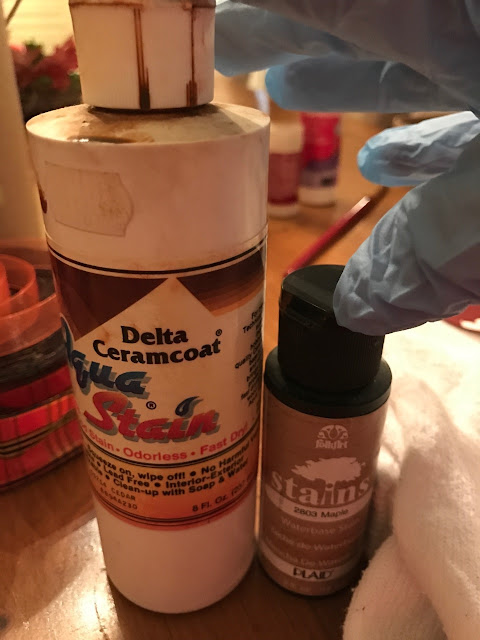
The final finish was a coat of water based maple stain - it just gives the boxes a more vintage look.
A simple plaid bow added to the bottle carrier finishes off the look.
I filled the little boxes with some faves of my grand-babies, peanut butter M&M's, gold coins, Skittles, gummy bears and the center box has 3-$2 bills. Scatter the leftover candies around the box to stabilize the boxes.
I let them completely dry overnight and ready to place the $2 bills inside the middle box, close the lids and ready to take on Thanksgiving day.Suggestions for non-alcoholic gift -some type of sparkling drink and the cute "Mars Christmas Celebration" bottle has little candies like Snickers, etc.
Just gotta love The Graphic's Fairy for all the free and wonderful images.
Hostess gifts, check! This is a fun project and very easy to do, a few steps and plain paper mâché boxes are elevated, your own design, and I think that makes them special. The boxes themselves are very inexpensive and more so if you are able to find them on sale. The small ones are .99¢, the bottle and the square box were both $4.99 - watch for them on sale. I look forward to using this process to make other boxes for other holidays, birthdays, etc.
Resources
Paper mâché boxes, Hobby Lobby, Michael's, online
Full sheet labels, craft and business supply stores, Link
Annie Sloan decoupage, Online, specialty stores
Mod Podge, Hobby Lobby, Michael's, Link
Recipe for sealer, Link
Free Thanksgiving Images, The Graphic's Fairy
Aqua Stain, Hobby Lobby, Michael's,hobby stores, online
Plaid Ribbon, Hobby Lobby, Michael's, Link
American Decor chalk paint, color Cameo, craft and hobby stores and online.
Mars Celebration Bottle, Link
Thank you for stopping by.


ABSOLUTELY AMAZING!!!!!!!!!!!!!
ReplyDeleteI JUST DON'T KNOW HOW TO POST TO YOUR FANTASTIC POSTS!!!!!!!!!!
EVERYONE EXCEEDS THE PREVIOUS ONE !!!!!!!!!!!!!!
As always thank you for your kind words Anonymous. Thank you for stopping by.
ReplyDelete