Monday, June 29, 2015

UPDATING THE MUDROOM!


The mudroom makeover.....

For sometime I have been saying to myself "I must do something about this mudroom!" I come in from the garage put my things away and forget about it - finally I have done what I call a mini-update to the mudroom.  It was not bad but needed to be better.
               
I started with the auto themed hat boxes (they really do contain hubby's hats), they worked great in a closet but not so good in the mudroom.
I covered them with vintage wallpaper (from the 40's) and lined them (the bottom too) with vintage newspaper (NY Times, June 1944).  I will put a link at the bottom from a previous blog post showing how to do this and links to resources.
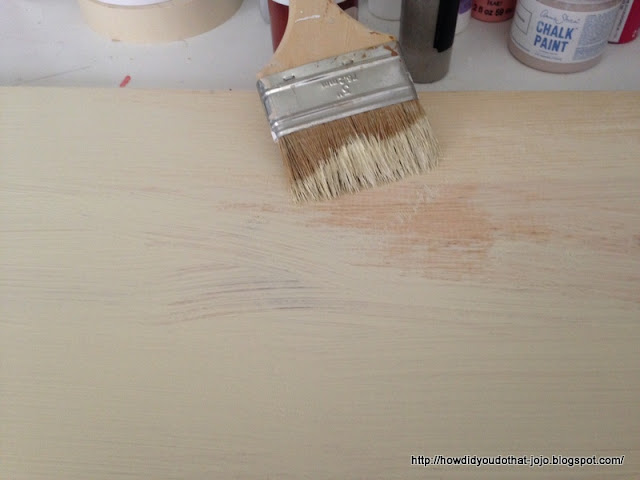
Needed to make a sign as the nice artwork I had there was never hung because I knew it was not right for the space. So hubby cut me a board, sanded it a little and I dry brushed it a pale yellow.
Using a stencil and some Annie Sloan paint added a cocoa brown color to the sign.
 To hubby's shop (where my small hand sander lives) to "antique" the sign. After wiping off all the sawdust the sign gets a clear coat finish.
After completely drying back into the house to add a couple of metal evergreens.
 Finished product - this time of year all we really need is a windbreaker (sometimes) so for now not many coats here but that will change with winter.  Also reminded us to go through things and give hats/coats to the Goodwill that we no longer use.

Resource

Farmer's Market Sign, will be available soon on BOM
Link to post for covering the hatboxes, Link
Ikat design linen/rayon fabric on pillows & pad, Bedazzle by Waverly
Baskets, Pottery Barn

Thank you for stopping by.


Tuesday, June 23, 2015

FRUIT TART FOR ALZHEIMER'S IDAHO

If you follow this blog you know that I volunteer for Alzheimer's Idaho support group (local grassroots organization). They are meeting early this month and it's summer so a smaller group - I decided to make a cool summer dessert - fruit tart with pastry cream and strawberries, blackberries, blueberries and kiwi.
For a tart like this I would normally make a sweet pastry with cream cheese but no cream cheese so I just made regular pie pastry.
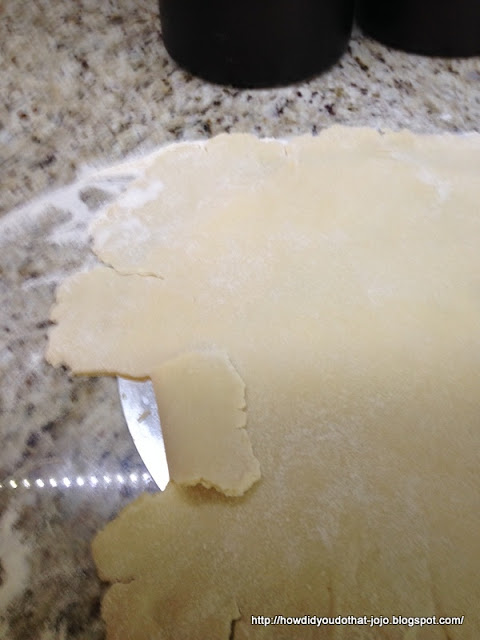
A little trick to transfer the pastry to the ring is to slip the insert under the pastry and then with the tip of a knife lift up the insert and you can then transfer it to the ring and trim the edges.


Brush the crust with egg wash and dust with super-fine sugar.
The recipe that I used for the pastry cream is one that was given to me by Butchart Gardens, located on Vancouver Island, BC. I did a post on the gardens after a visit. They share many recipes but asked that I not publish this recipe for the pastry cream - any pastry cream recipe will work for the tart. I will put a link to a recipe below in the resource area.
I had to get out my metric tools for this one - but it worked.
Put the pastry cream in the fridge until cooled - stirring every once in a while - you do not want a film to develop. Once the pastry cream has cooled fold in sweetened vanilla whipped cream until all combined.  My recipe for the pastry cream called for two cups of milk so I whipped 1 cup of cream with vanilla paste and some superfine sugar.
Wash your fruit and pick the best "pointy" strawberries, slice a small piece off each side and cut in half and form the circle around the tart - brush them with a little apricot glaze - just add a little water to some apricot preserves and brush with a pastry brush.  Add the blackberries around the edge and brush them with the glaze and then fill in with blueberries, blackberries, a little sliced strawberries and some sliced kiwi's and brush them with the glaze.  Chill until ready to serve.
Here it is ready to be served to those wonderful, deserving of a good dessert and dinner, women.  Hope they enjoyed.

Resource

Tart pan, Williams-Sonoma
Footed cake stand, Williams-Sonoma
Recipe for pastry cream, The Tough Cookie

Thank you for stopping by.


Thursday, June 18, 2015

BISON BURGERS ON BRIOCHE BUN WITH CARMALIZED ONIONS AND CHIPOTLE JAM

Making this burger is the reason I made the Chipotle jam (see my post of June 11, 2015). If  you don't want to make the jam just leave it off - won't be the same but still will be a darned good burger. There are some apple-chipotle sauces available online and at specialty stores but I cannot recommend any of them because I have not tried them and I love the flavor of the chipotle in adobo but do not want it too hot.  My grandsons ages 8 and 9 had these burgers - they were not too hot.
 
Making a menu card is something I have done for many, many years. If you come to my house for dinner it will be in my cookbook stand by the stove.  The card serves several purposes - first I use it as a guide for my shopping list, a reminder to don't forget anything but then I realized years ago that there was an unintended consequence - I save them and when I find them among my things I am brought back to that dinner, those guests and that time. Nostalgia at it's best.

One of the key factors to this yummy hamburger is the bun.
This is what most people think of when you say brioche but brioche is a buttery egg dough that comes in many forms.
This is what to look for - good luck.  I had no idea that these delish buns would be so hard to find - at least in the Boise area.  I made many calls and finally hit pay dirt by another name.
Finally I found some buns.  I expected when I went to Zeppole to pick up my buns that they would be kosher and contain no dairy (and you know a brioche French bread would have a lot of butter) but to my surprise the buns were not kosher so I'm thinking these are really more like a brioche but - they were just what I was looking for, delicious, perfect. King's Hawaiian does make a hamburger bun so if you want to make these and cannot find brioche I think this would be an OK substitute.


Decided on a simple tablescape with items that work with "burgers in a basket" plastic baskets from HomeGoods (I think I saw them at the $store too) red and white checked tablecloth, some favorite country looking salad plates for the potato salad and dessert - plus my gran-daughters favorite item - the ketchup squeeze bottle. I have always liked to use place cards even with family.  They are especially good with smaller children because they just look for their name and there is no dialogue on who get's to sit by....you know what I mean?

I did not take many  photos while making the burgers but will give directions below.  The caramelized onions are so important in this recipe - oh so simple to do - add a little butter and some EVOO in the bottom of a large pan and let them get some heat and then add the onions, salt and pepper them, do not get the pan too hot, take your time, just keep turning and stirring them. Eventually they will turn a golden brown and if you keep going they will get even a deeper brown. The sweeter the onion the easier they are to caramelize.

A big, yummy burger! They are 1/3 pound burgers so a few halves were sent home in "doggie bags."  Because they do not have lettuce, tomatoes, etc. easy to reheat.

Ingredients:

Ground Bison (if you cannot get use ground sirloin) Many Costco's carry bison.
Rolls, preferable brioche
Sweet onions, Vidalia or other sweet onions.
Cheese, we offered American, Kraft's chipotle and cheddar
Apple-Chipotle jam
Salt & Pepper

Directions:

I used (4) large sweet onions for (6) burgers and we used all of the onions. Put the sliced onions in a large pan with a little butter and some EVOO and add salt and pepper and cook, turning often, until they are a nice golden brown and caramelized. Turn down the heat to the lowest and keep them warm until time to use.

Make you 1/3 pound patties - size of the pattie depends on the size of the bun. Be sure and put a thumb print in the middle of the pattie to make for more even cooking. Place on your BBQ and use salt & pepper only for seasoning. When they are done place the cheese on top to melt.

On a griddle pan (or big cast iron skillet) add some butter and toast the bottoms of the buns.

To put the burger together place the pattie on the bottom of the bun, then pile on the onions, finally drizzle the apple-chipotle jam on the onions (because it is a jam and I wanted it to be drizzled I heated some in the microwave until it melted and could be poured) add a little Best Foods (Hellman's) mayo to the top of the bun, wrap in paper and place in the basket with some sweet potato fries! Enjoy!

Resource

Salad plates, Kohl's
Burger baskets, Ketchup bottle, HomeGoods
Red & White buffalo checked tablecloth,Bistro Check Casual Tablecloth Red White Striped Checkered Pattern 60 " x 102 "
Hem-stitch napkins, Williams-Sonoma 
Salt & Pepper shakers, HomeGoods
Water goblets, Villeroy & Boch Bernadotte Goblet
Red handled flatware, Hampton Forge Argent Sophia 20-Piece Flatware Set, Red, AFU70920QF
Red checked burger wrappers/basket liners, restaurant supply store or,Regency Basket Buddies, Red Check 24-pack

Thank you for stopping by.


Tuesday, June 16, 2015

THAI CHILI COCONUT SHRIMP TACOS

Do not let the long name of these tacos fool you - these are the most delicious and easiest to make tacos ever - hubby declared "restaurant quality."  They came about because I saw a recipe that was really complicated, required that you make your own Thai chili sauce, lots of pineapple, etc. So I just took what I thought would be best and made these oh so easy tacos.
Only 6 ingredients needed....I only see five you say...well, that is because I forgot to put in the avocado slices until I had already taken the photos, so pretend you see an avocado in the photo!

1. Shredded cabbage - I bought a bag that was already shredded
2. Corn tortillas
3. Coconut Milk
4. Thai sweet chili sauce
5. Shrimp (I used large) cooked or uncooked, tails removed
6. Avocado, sliced 

First thing that I did was to spray a grill pan and add the shrimp - if the shrimp are already cooked (mine were) you do not want to cook them just reheat them( if you cook them again they will become like rubber) let them warm on one side, turn them over and turn the heat down as far as it will go.  If they are raw do the same thing but take longer.
 The next thing to do is to put some of the Thai sweet chili sauce (available in regular grocery stores in the Asian food section) in a bowl (the amount will depend on how many tacos you are making) then add a couple of dollops of coconut cream.  Coconut cream is created when you chill a can of coconut milk - I just put the can in the fridge overnight - the cream will separate from the coconut water and you can just dip your spoon in the can and get the cream.  I actually made these twice and just put the can in the fridge in a plastic bag.  The second time it had become a little creamier but I was still able to get the cream.  Mix the chili and the coconut cream together.
Pour some of the cream/Thai sweet chili sauce into the shredded cabbage - not too much but enough to cover all the cabbage.
Take some of your leftover sauce pour over your warm shrimp and mix well.
It only takes 35 seconds in a tortilla warmer in the microwave to heat the corn tortillas and make them soft - then add some of the shredded cabbage, top with the shrimp and add avocado slices on the sides of the shrimp.  I served with some left over rice and beans and Sriracha hot sauce - which hubby used sparingly but said it was nice to have the added zip. Personal preference.

I cannot tell you how fast these come together and how easy - the shrimp cooks or re-heats in minutes, the tortillas are steamed not fried (if you do not have a tortilla warmer just cover them with a cotton kitchen towel and heat in microwave) the cabbage is already shredded and the sauce is a combination of two items already prepared.  The only thing you need to do out of the ordinary is to chill the coconut milk. If you are in a big hurry and don't have time to make some rice and beans - stop by your favorite Mexican restaurant and get an order of rice and beans to go.

I was not going to blog this but Hubby encouraged me to do so and ask that I remember to make these again.  They are very high in protein especially if they are pared with beans and rice, low in fat and the coconut cream has 70 calories in 1/3 cup. The sweet Thai sauce probably has more sugar than a nutritionist would like but hey - they make the meal and the avocado is good fat. Another plus is that you don't have to be in a hot kitchen now that it is summer, especially if you purchase the rice and beans. All good.

Resource

All ingredients are available at your local supermarket, Walmart, etc.

Recipe adapted from Closet Cooking


Thank you for stopping by.


Thursday, June 11, 2015

APPLE-CHIPOTLE JAM


 I have a recipe in mind for a little family get-together on Sunday and I needed some apple-chipotle jam or jelly - so decided to make a batch yesterday.


First things first - moseyed over to the The Graphic's Fairy and found this beautiful apple graphic and then I cut out the pepper on another graphic - feel free to use this label if you like but I will put the link to TGF below so you may easily find both of the graphics.
Really a very simple recipe -five ingredients, pure apple juice, pectin, chipotles in adobo and apple cider vinegar.

Recipe calls for 3-4 diced chipotle peppers seeds removed if you don't want your jelly/jam too hot.  I love the flavor of these chiles but they can pack a lot of heat so I prefer to just split them open and remove all the seeds.
 As you can see there are a lot of seeds in each pepper.
The recipe does not call for straining the jam but I strained it so that I could divide the chiles equally between the jars - while they are cooling you need to turn them over every few minutes to distribute the chiles in the jam. Once they start to jell the diced pieces of chiles will be set in the jam.
 One last turn, I think...
Cooled and set - add the label and  you are done!

Apple-Chipolte Jam Recipe

Ingredients:

 1-2 Tbls minced chipolte chiles in adobo sauce (3-4 whole chiles)
2 cups apple juice
6 1/2 cups sugar
1 cup cider vinegar
1 box of dry fruit pectin, such as Sure-Jell

Directions:

If you want to reduce the heat in your jam remove the seeds from the chiles, either way finely dice them.

Then add all of the ingredients to a large pot (except the pectin) stir and simmer the mixture over medium heat until the sugar is clear and all combined, stirring gently, should take about five minutes, skim off foam if necessary.

Stir in the dry pectin and stir to combine, bring to a boil and boil for two minutes.

Pour into sterilized jars and close the lids.  About every ten minutes turn the jars over and occasionally shake them.  Let them cool and then add the labels.

Yield: 6 - one cup jars

Cooks Notes:  This recipe has a LOT of sugar but remember this is not for slathering on biscuits (well, I guess you could) but is more like a savory condiment.  I will probably give all but a couple of these as gifts to folks.  Also the recipe said the yield was six one cup jars and I filled all six of mine and had enough leftover to pour into a larger jar. I am going to put a link below to "The Saucy Jalapeno" site as I found a more savory (and much less sugar recipe) that sounds awesome but I still wanted to make this one for our BBQ on Sunday.  What are we serving? Hint - it's a bison burger!

Resource

Apple graphic, The Graphics Fairy
Chili graphic, The Graphics Fairy
More Savory Recipe, The Saucy Jalapeno

Thank you for stopping by.